Overwinter Onions In My Zone 7ish Market Garden.
Earlier this year, I thought I had decided that I desired a break from starting my own onion plants for a few years. But, since all of my onion plants, okay, nearly all, from Dixondale had bolted on me this spring/summer, and they bolted on my daughters who garden a wee bit different from me (so it wasn’t just my doing), I’ve decided that I am just going to tough it out and go back to producing my own onion plants for transplanting out.
Typically I don’t get these started until August, but since last winter’s crop had issues with the two quick long cold snaps with “heat waves” as bookends to both, I’m getting them started earlier this year. I want you to join me, Dear Reader-Gardener, you will love winter gardening!
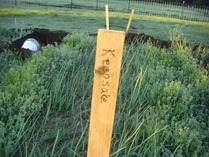
All of my seeds for this year’s onions are from Territorial Seed: Gate Keeper, Keepsake, Top Keeper, Walla Walla, Guardsman, Ambition shallots. Oh, and one left over packet of Texas 1015’s from I’m not sure who, bought a huge packet and didn’t use them all, shame on me, but some should still be viable. In the past I’ve used Johnny’s, West Coast and somebody else that I can’t quite remember, that would be the source of the Texas 1015s.
*I was going over inventory before I published this and found some packets that didn’t get planted in February, guess I’m going to experiment on how long day onions do in an overwinter situation. Onions seed viability goes way down with storage so I’d rather experiment than waste them not growing next spring.*
For overwinter onions you use the short day onions. Or a day neutral type. This is the one time you can use short day onions here in Washington, if you grew them in the spring like long day onions, they wouldn’t make much size before the day light hours told them to begin bulbing up.
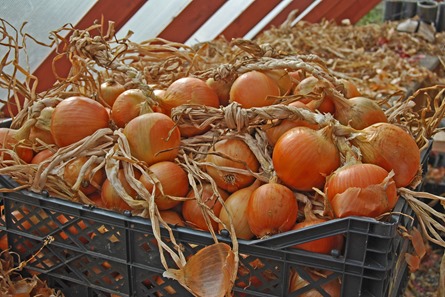
By growing short day onions this way you get a nice globe onion, either sweet or yellow storage, long before the long day onions are ready. Even though I grow a huge crop of long day storage onions that store until spring, I like growing storage onions from overwinter-early summer production. The early summer harvested storage types get me to the fall harvest of my main storage crop and it allows me to save the very long storage onions until later. And because sweet onions barely last a month or two on the shelf I like having two batches of sweets as well, a summer full of sweet onions on the grill! Pure bliss!
Starting the Seed
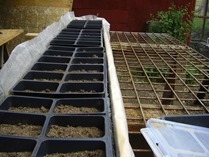
I start them on the propagation bench not in the garden, too tiny (not the garden, the seedlings).
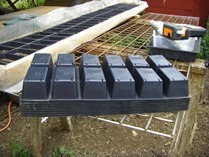
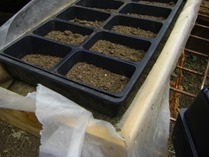
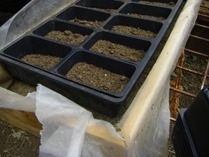
I use the insert for the flats that have two rows of six rectangle pots, fill them with a seed starting mix, wet the soil from the bottom in my bottom water trough. and then plant away.
No, First I Make My Labels.
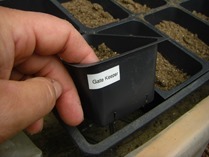
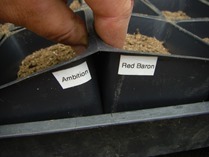
Oh wait, before I get everything wet, I mark the pots. I label the pots because I always loose tags – you know, the plastic tags that you write on and stick in the soil. Yeah, roaming poultry love to pull them out. Or when moving flats I flip them out. So, I’ve learned to mark the pots. I don’t want each pot marked, that would be crazy, and because I usually plant the same variety for the whole flat or half flat I devised a method for marking them that saves me from marking every pot.
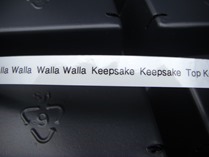
I love my Brother label maker, wouldn’t garden without one any more! I’ve learned how to make a string of labels so that I don’t have to waste the starting strip. I print off two for each variety unless I am doing two flats of the same variety then I need four.
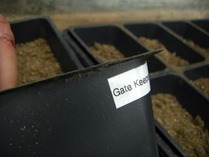
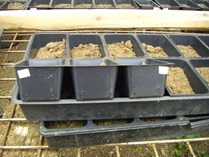
I begin by putting the label on the front left corner. I calculate how many sets of two I’m going to use (I always put the same variety of seed in the front and back pot, unless it is some super special seed then each pot gets labeled obviously, but for this application and most of my planting I use the two pots together) and then I place the second label for that variety on the right side of the last pot I’ll be using. The next variety goes on the next pot on the left corner and so on and so on. If I’m filling the whole flat with the same seed I still put the second label on the right side of the last pot. That way I know it is all that one variety and I didn’t lose labels. I’ve never had a label pop off but….
Soak the Soil Mix
After I have my labels on I soak the trays in plain water. Once the seedling come up I will begin soaking them in a fertilizer mix specific to the type of crop seeded. (one of the reasons that I seed the same type of crop in one flat). But for now, just plain water will do.
I never water from the top down. I always water freshly filled trays, seeded trays and seedlings, from the bottom. I have my reasons. Okay, I’ll side track and tell you. I am not a germaphobe even in the garden or at the prop table, I don’t sterilize stuff. But I do take care to not cause extra problems and one of those is getting water where it shouldn’t be, on baby leaves and in crowns. So I bottom water. I also bottom water to keep soil and seeds where I put them, not to where the water will move them. I find it way easier to just treat everyone the same, I stay less confused that way, and tender stuff doesn’t get the treatment the tough guys get, by accident. It is also my preferred method for fertilizing young seedlings. I add the fert to the water in the trough (a plastic lined wood trough). I find I go through less fertilizer by bottom watering even on seedlings that can take it.
When I’m prepping the trays for seeding, I soak the heck out of them. Pull them out and let them drain. It is one of the few times when I “over water” and they are dripping wet. I do that so I know that all the starting mix is wetted and then when I put more starting mix on top of the seed, the new soil will absorb the excess and become wet without my having to re-water the tray.
For the most part, approximately 30-35 seeds are going in each individual pot, some sources say you can put 100 onion seeds in a 4-6” pot, I think that is crazy too many. But with 30-35 seeds in one of the pots it comes out to about 400 seeds per tray or one 2 gram packet of seed.
Once Seeded and Growing
Once the flats are all seeded and growing I will add a liquid fertilizer to the water in the trough. For these onions I will first use a seaweed fert to get the roots off to a good start and then later I’ll switch to a fish fert for a higher nitrogen content. If I don’t want to bust a dollar bill over it I just use my own manure tea.
They need proper light but they sure as heck don’t need to fry in on the prop bench in the greenhouse if it is a hundred kelvin out. So they just sit on some temporary bench up away from the scratching feet of wandering poultry. The cats tend to just sit and look at them, one of the reasons I rarely plant in whole flat inserts any more is the nasty sad occurrence of the farm cats thinking they had died and gone to heaven and some one had supplied them with the bestest litter trays ever!
After about six weeks or more, some time between September and October (or a bit later if I’m distracted) I will begin planting them out. Don’t give them a lot of nitrogen (manure or compost) at this point because that will make them too tender to ward off the cold.
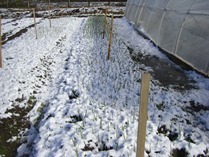
After they are well established and have taken a chilly few days go ahead and give them a nice mulch, it will protect them from being displaced by the soil heaving from freezes. The freezing usually doesn’t kill them but the heaving up out of the soil will.
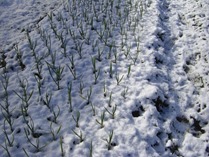
They won’t grow a whole lot during the winter (typically), so when you plant them out and when you start planting your peas in the next bed over in February, they will look pretty much the same. But then they will take off quick because they are used to the cold and thankful for the warm days of late winter – early spring. Give them a nice shot of nitrogen while you are out there planting your peas. Manure or compost, either one, don’t worry about it getting down to the roots, onions have shallow roots. Just pull off the mulch you gave them for the winter and put the manure or compost, or a mix there of, down in the same spot. You may find that your mulch has diminished enough that you can just put the manure right on it. Do it. But if you’re using beautiful compost, I’d pull the mulch back, put the compost down and put the mulch back.
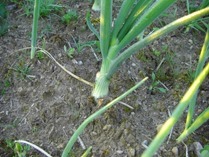
They have a huge head start so that when the day length gets just right they begin bulbing in May or early June (depends on how over cast our spring is) they will be nice size. The goal is to have around 7 or more visable “leaves” on the onion plant before bulbing begins, each leaf is a ring on the onion, not many leaves=not many rings=not a very big onion. If you check on them in late March or April and they don’t seem to have enough leaves even if you have given them manure or compost then hit them with some manure tea, make sure you spray it on them before 11 am.
Your Reward for Your Bravery
They will go tops down and you can begin harvesting in July or sooner depending on our skies. The sweet types, Walla Walla for instance, you should start harvesting and eating as soon as you like the size they are, they won’t last long out of the soil. The storage types will take you far into fall maybe even December before you have to start raiding the deep pantry for your fall harvested longer storage types.

